How to create a 2d game in unity
“Hey there, Ready to dive into the exciting world of game development? We’ve got just the thing for you – a step-by-step guide on how to make a 2D game in unity! Whether you’re a seasoned developer or just starting out, this article is packed with easy-to-follow instructions and insider tips to help you bring your gaming dreams to life. So grab your favorite beverage, get comfy, and let’s embark on this thrilling journey together. Get ready to unleash your creativity and let’s make some magic happen in the world of 2D gaming!”
Creating 2d game in unity will be exciting and easy unlike other game engine unity provided lot of free assets and tools to create 2d game in unity within a hour if you are expert. When you create a 2d video game with unity once you feel so happy.
Introduction to Unity and 2D Game Development
Unity is one of the most popular game engines in the world, known for its versatility and ease of use. Originally designed for 3D game development, Unity has evolved into a powerful tool for creating 2D games as well, offering a wide range of features that make it the go-to engine for both indie developers and larger studios alike. With its user-friendly interface, cross-platform compatibility, and a rich set of tools, Unity simplifies the development process for creating immersive 2D experiences.
2D game development in Unity is particularly well-supported, with an array of tools and features specifically tailored to 2D workflows. Unity’s 2D toolkit includes sprite rendering, 2D physics, tilemaps, and built-in animation systems. Developers can easily create 2D sprites, animate them, and handle interactions between game objects with Unity’s intuitive drag-and-drop interface. Whether you’re building a simple 2D platformer or a more complex action-adventure game, Unity provides the necessary building blocks to bring your vision to life.
One of the biggest advantages of Unity for 2D game development is its extensive asset store. Developers can access a huge library of pre-made assets, from characters and environments to sound effects and scripts. This can greatly speed up development and allow small teams or solo developers to create high-quality games without having to build every asset from scratch.
Additionally, Unity’s ability to deploy games across a variety of platforms—including PC, mobile, and web—makes it ideal for 2D games aimed at a broad audience. With Unity, developers can focus on creating engaging gameplay and storytelling, knowing that the engine will handle the technical complexities of cross-platform deployment.
Overall, Unity is a powerful, accessible, and efficient tool for 2D game development, making it an excellent choice for both beginners and experienced developers.
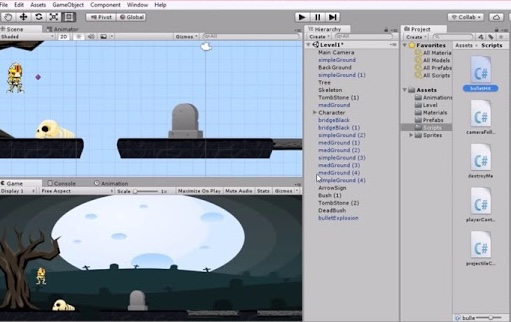
Setting Up Your Unity Environment
For creating our 2d game in unity we Setting up Unity for 2D game development is straightforward and can be done in a few simple steps. Here’s a guide to get you started:
1. Download and Install Unity Hub
First, download Unity Hub, a central management tool for Unity versions and projects. From Unity Hub, you can install the latest version of Unity with the 2D Game Development module. Unity Hub helps you manage different versions of Unity, making it easier to switch between projects.
2. Create a New 2D Project
Once Unity Hub is installed, open it and click New Project. In the project setup window, select 2D from the templates (you’ll see options for 2D and 3D). This automatically configures the project for 2D workflows, adjusting camera settings and physics for optimal 2D development.
3. Adjust the Scene Settings
By default, Unity’s camera is set to 3D. For a 2D game, you need to change the camera projection to Orthographic. This gives you a flat, 2D perspective, which is ideal for side-scrolling or top-down games. You can do this in the Inspector window by selecting the Camera and setting its Projection to Orthographic.
4. Import 2D Assets
To start building your game, import your 2D assets (sprites, backgrounds, UI elements, etc.). You can do this by dragging your image files into the Assets folder in the Project window. Unity supports a wide range of file types, including PNG, JPG, and PSD.
5. Set Up the 2D Physics
Unity automatically enables 2D physics for new 2D projects. Ensure that 2D colliders and Rigidbody2D components are added to your GameObjects for interactions like collision detection and physics-based movement.
With these steps, your Unity environment is ready for creating 2D games, offering a solid foundation for developing gameplay, animations, and interactions.
Create a 2D Game Scene first for your game
Creating your first 2D game scene in Unity is the foundation of your game development journey. Start by launching Unity and opening a new 2D project. This automatically sets up the camera and scene for a 2D workflow, making it easy to get started.
- Setup the Scene: In the Scene view, start by laying out the basic elements of your game environment. Add background elements (such as a sky or landscape) by dragging your sprite assets into the scene. Unity’s 2D view ensures the correct positioning along the X and Y axes, giving you a perfect 2D perspective.
- Create GameObjects: Next, create GameObjects to serve as interactive elements in your scene. For example, add a Player character by dragging a sprite into the scene. Create other objects like platforms, collectibles, or obstacles by using simple shapes like squares or rectangles, which can later be replaced with detailed assets.
- Set the Camera: Adjust the main camera to ensure the player is always visible within the bounds of the screen. You can use the Camera’s orthographic view, which is ideal for 2D games, and fine-tune its size to fit the desired play area.
- Lighting and Environment: Lighting in 2D games doesn’t need to be as complex as in 3D, but you can add 2D lights to create atmosphere, such as ambient light or a directional light for sun/moon effects.
With these basic steps, you’ve laid the foundation for your game. You can now add more elements like the player’s controller, obstacles, or items to interact with. This initial scene sets the tone for your game’s world and allows you to test basic game mechanics.
Download Game Assets from Unity Asset Store
The Unity Asset Store is an invaluable resource for downloading ready-made game assets. Whether you’re creating a 2D platformer, top-down shooter, or puzzle game, the Asset Store offers thousands of pre-made assets—such as characters, backgrounds, sound effects, and even entire environments—ready to be integrated into your project.
- Access the Asset Store: Inside Unity, open the Asset Store window by selecting Window > Asset Store. You’ll need to sign in with your Unity account to access the full library.
- Search for Assets: Use the search bar to find assets relevant to your game. You can filter by asset type (e.g., sprites, textures, animations, or sounds) and sort by popularity, price, or ratings. Unity offers both free and paid assets, so you can start with free assets to prototype your game before investing in premium content.
- Import Assets: After selecting your asset, click the Download or Add to My Assets button. Once downloaded, you can import it directly into your project by selecting Import. Unity will automatically add the asset to your project’s Assets folder.
- Use Asset Packages: Many asset packages are complete sets that include textures, sprites, animations, and even scripts. By importing these packages, you can quickly create complex environments, characters, or UI systems without starting from scratch. For example, you could import a 2D character package that already includes running and jumping animations, saving significant time.
- Organize Your Assets: After importing, organize your assets into folders (e.g., Sprites, Sounds, Animations) to keep your project structured and prevent confusion as it grows.
The Unity Asset Store is an excellent resource for developers of all skill levels, especially when you’re trying to accelerate development or add high-quality assets to your game without creating everything from scratch.
Implementing Player Controls and Movement
Implementing player controls is a core aspect of any game, and Unity makes it easy to develop smooth and responsive controls for your 2D game.
- Add a Player GameObject: Start by creating a new Player GameObject, which will serve as the character or object controlled by the player. You can create a simple GameObject using a 2D sprite or import an animated character from the Unity Asset Store.
- Add Rigidbody2D Component: To allow physics-based movement, attach a Rigidbody2D component to the player GameObject. This makes the object respond to gravity and other physical forces. Make sure the Body Type is set to Dynamic so the player can move in response to player input.
- Create a Player Movement Script: Write a simple C# script to handle player movement. In the script, use Unity’s Input system to capture player inputs like arrow keys or WASD. For example, you can use the following code to move the player horizontally:
float moveInput = Input.GetAxis("Horizontal");

rigidbody.velocity = new Vector2(moveInput * speed, rigidbody.velocity.y);
This script reads the player’s input and applies velocity to the Rigidbody2D, enabling movement.
- Handle Jumping and Gravity: For jumping mechanics, you’ll need to detect when the player is on the ground to avoid double-jumping. You can use Unity’s built-in OnCollisionEnter2D function to check for collisions with the ground and apply an upward force when the player presses the jump button:
if (Input.GetButtonDown("Jump") && isGrounded)

{

rigidbody.AddForce(Vector2.up * jumpForce, ForceMode2D.Impulse);

}
- Smooth Player Movement: Use smoothDamp or Lerp functions for more natural movement and better handling of speed transitions. You can also adjust the drag and gravity scale in the Rigidbody2D component to fine-tune the player’s responsiveness and feel.
Once this is in place, test your game by running it and adjusting the controls to make sure the player’s movement feels fluid and intuitive.
Adding Physics and Collisions to Your 2D Game
Adding physics and collision detection is crucial to making your game feel interactive and dynamic. Unity’s built-in 2D physics engine makes this process straightforward.
-
- Add Colliders to GameObjects: First, add appropriate Collider2D components to your game objects. For static objects like walls, platforms, or obstacles, use BoxCollider2D or PolygonCollider2D. For characters or movable objects, use CircleCollider2D or CapsuleCollider2D. Make sure that each GameObject that interacts physically has a collider.
- Implement Rigidbody2D: To enable physics interactions, you need to attach a Rigidbody2D component to any object that should move or be affected by forces. For example, the player and enemies should have Rigidbody2D components to interact with forces like gravity, momentum, and collisions.
- Handle Collisions and Triggers: Use Unity’s OnCollisionEnter2D(), OnCollisionStay2D(), and OnCollisionExit2D() methods to handle interactions when two colliders touch each other. For example, when the player hits an obstacle, you can reduce health or trigger an event.
- Tuning Physics Properties: Adjust Rigidbody2D settings like mass, drag, and gravity scale to refine how objects behave. For example, to make an object fall more slowly, reduce the gravity scale or add air drag to slow down horizontal motion.
- Use Layers for Collisions: Utilize Unity’s Layer Collision Matrix to control how different objects interact. You can create custom layers like “Player”, “Ground”, or “Enemy” and set up collision rules to avoid unnecessary calculations (e.g., prevent enemies from colliding with other enemies).
Here is the code form point 3 above for collision
void OnCollisionEnter2D(Collision2D collision)

{

if(collision.gameObject.CompareTag("Obstacle"))

{

// Handle collision response (e.g., lose health, bounce, etc.)

}

}
Physics and collision handling are vital to making the game world feel interactive. Once implemented, test your game to ensure everything behaves as expected, tweaking parameters as needed.
Adding Audio and Visual Effects
Audio and visual effects play a crucial role in enhancing the player’s experience, providing feedback, and making your game world feel alive.
-
- Importing Audio Assets: Begin by importing your sound assets (such as background music, sound effects for actions, or ambient sounds). You can import them by dragging the audio files into Unity’s Assets folder. Unity supports common audio formats like MP3 and WAV.
- Adding Audio Sources: To play sounds, create an AudioSource component and attach it to the appropriate GameObject. For example, add a background music track to a Main Camera or an Enemy for sound effects. In the Inspector, you can assign the audio clip you want to play and adjust settings like volume, pitch, and looping.
AudioSource audioSource = GetComponent<AudioSource>();

audioSource.Play(); - Play Sounds in Response to Events: Trigger sounds based on game events. For example, you might want to play a sound when the player jumps, picks up an item, or collides with an object. Use the appropriate Unity functions to trigger these events:
if (Input.GetButtonDown("Jump"))

{

AudioSource.PlayClipAtPoint(jumpSound, transform.position);

} - Visual Effects with Particles: Unity provides a powerful Particle System to create visual effects like explosions, smoke, fire, or sparkles. Create a new ParticleSystem object and adjust its settings (e.g., particle size, lifetime, emission rate) to create dynamic effects.
- Animations for Visual Feedback: To enhance visual storytelling, you can add animations to objects or characters using Unity’s Animator component. For instance, animate the player’s character running, jumping, or getting hit. Use SpriteRenderer for 2D sprite animations.
- Post-Processing Effects: Unity’s Post-Processing Stack allows you to add high-level visual effects like blur, bloom, or color grading. This can help set the mood and improve the game’s aesthetics.
Adding the right combination of sound and visual effects can significantly improve the immersion and feel of your 2D game, making it more engaging for players.
Testing and Debugging Your 2D Game
Now you have created 2d game in unity now it’s time to test your game. Testing and debugging are essential steps in game development to ensure that your 2D game works as expected and provides a smooth experience for players.
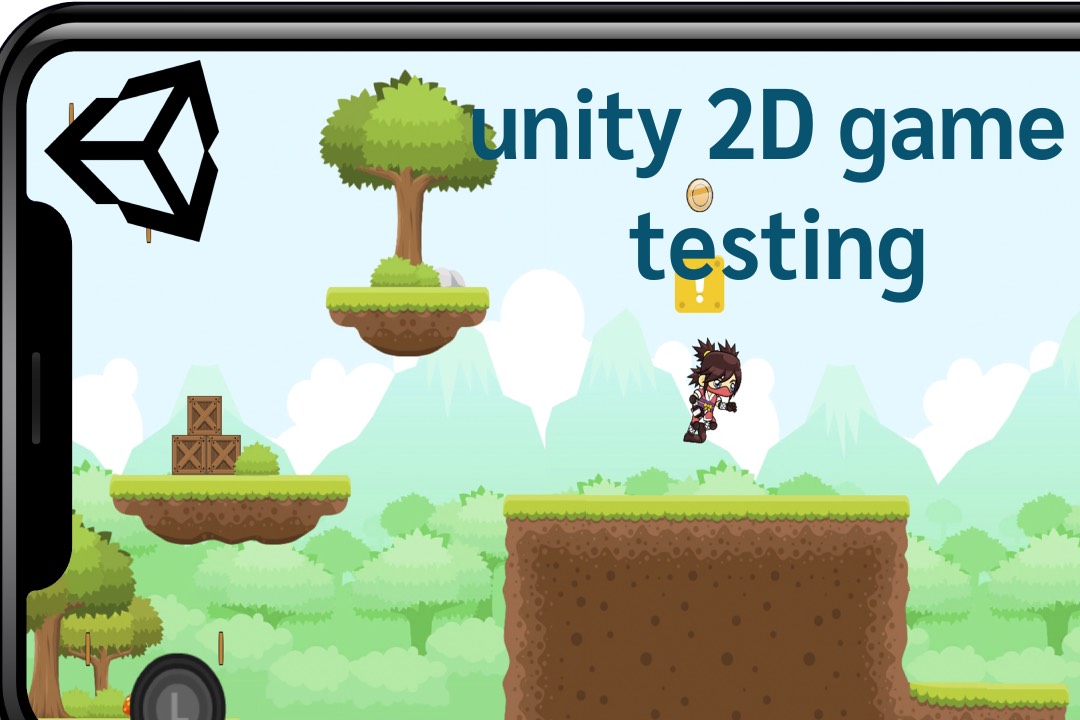
- Test Regularly: As you develop your game, it’s crucial to test it frequently. Playtest your game often, especially after adding new mechanics, features, or assets. This helps identify any issues early in the development process, such as broken controls or unexpected behavior.
- Use Unity’s Console for Errors: The Console window in Unity is an essential tool for debugging. It displays warnings, errors, and log messages, which can help you track down issues in your scripts. Pay attention to red error messages that indicate runtime issues or unhandled exceptions.
- Check Collider and Physics Interactions: Test collisions, triggers, and physics interactions by running the game in Play mode. Use Unity’s Scene view to visually inspect the collision boxes, Rigidbody2D components, and interactions. If objects are behaving incorrectly, check the settings of colliders, rigidbodies, and their respective layers.
- Use Debug.Log() for Debugging: Insert Debug.Log() statements into your scripts to print useful information to the console, such as object positions, health values, or input values. This can help you identify why a specific action isn’t working as expected:
Debug.Log("Player Health:+ playerHealth);
- Profiler for Performance Testing: Unity’s Profiler allows you to monitor performance during gameplay, checking metrics like frame rate, memory usage, and CPU/GPU performance. If your game is running slowly or experiencing stuttering, use the Profiler to identify bottlenecks like expensive physics calculations or unoptimized assets.
- Playtesting: Having others playtest your game is essential. They may uncover bugs you missed or suggest improvements in gameplay. Use feedback to iterate and improve the game, especially when it comes to difficulty balancing or player experience.
By consistently testing and debugging, you can ensure your game runs smoothly and provides a satisfying experience for players. Regularly fix bugs, polish the gameplay, and tweak mechanics for better performance.
So these are the step and process of creating a simple 2d game in unity. Now after this you can chose any of the platform like android, IOS, window and can create build. Create your 2d game in unity and share your feedback with Us.